Saturday, December 13, 2014

We had some chocolate chips in the pantry, but I didn't have all the ingredients needed to make fudge. So, rather than run to the store, I decided to invent a recipe for salted chocolate caramels. These caramels make a delicious, salty 'n sweet treat.

Ingredients:

2 cups of sugar
2 cans of sweetened condensed milk

1 ounce can of evaporated milk
2 sticks of butter (1 cup)
2 cup of dark molasses*
2 teaspoon of vanilla

2 cups of semi-sweet chocolate chips

Directions:

Melt the sugar, milks, butter and molasses together in a medium saucepan over medium/low heat. Bring the mixture to a boil and stir every couple of minutes until it reaches a temperature of 235°F to 240°F on a candy thermometer. You will need patience for it to come up to temperature, and you'll need to be careful not to let it scorch.


Remove the pan from the heat, add vanilla and 2 cups of semi-sweet chocolate chips. Mix until all the chocolate chips are melted.

Pour the mixture into two baking dish, or two cookie sheets, that have either been greased, or lined with parchment paper. Allow the caramels to cool at room temperature for an hour. Score the candy into bite size piece that you can break apart when it's completely cooled. Sprinkle Sea, or Kosher, salt on top after you score the candy and you'll have an awesome salty/sweet treat.

*Note:  Here in Costa Rica, I make my own molasses with unrefined brown sugar cakes called "Tapa de Dulce". This is crude sugar cane juice that is cooked down until it caramelizes. Then it's poured into wooden molds and left to cool and setup into brown sugar cakes. I melt the "Tapa de Dulce" with an equal part of water and let it simmer until it reached the consistency of syrup, about 225°F on a candy thermometer. 
0

Friday, December 5, 2014

Every year the community hosts a Christmas Party for the poor children in Atenas. A Christmas tree is put up and decorated with paper Angels. The back of each Angel lists an age and what the child wants for Christmas. This year there were over 300 angels on the tree and folks in the community took Angels off the tree to buy presents. Tomorrow is the annual Angel Party for all the children. There will be pizza and refreshments and Santa will be on hand to pass out present to everyone. I volunteered to make cookies for the event this year. I decided to make Santa's Thumbprint cookies, but I wanted the filling to be something special that Latin Children love. So, instead of Raspberry or Strawberry jam, I used Guayaba (guava jelly); a staple here everyone enjoys.

Ingredients:
1/2 cup guayaba (guava) jam or jelly
2 1/4 cups all-purpose flour
1 teaspoon baking powder
1/4 teaspoon salt
2 sticks (1 cup) butter, at room temperature
2/3 cup sugar
2 large egg yolks
1 tablespoon finely grated lemon zest
1 tablespoon fresh lemon juice
1 teaspoon pure vanilla extract

Directions:
Preheat the oven to 350 degrees F. Lightly butter 2 large baking sheets.

In a medium bowl, combine the flour, baking powder, and salt and whisk to blend.

In a large bowl using an electric mixer, beat the butter and sugar until light and creamy. Beat in the egg yolks, lemon zest, lemon juice and vanilla. Add the flour mixture in 2 additions and beat just until moist clumps form. Gather the dough together into a ball.

Pinch off the dough to form 1-inch balls. Place on the prepared baking sheets, spacing 1-inch apart. Use your floured index finger or 1/2 teaspoon measuring spoon to create depressions in the center of each ball. Fill each indentation with nearly 1/2 teaspoon of the jam mixture. Bake until golden brown, about 20-22 minutes.


Transfer the cookies to wire racks to cool completely.

Yield: About 2½ dozen cookies
0

Sunday, November 23, 2014

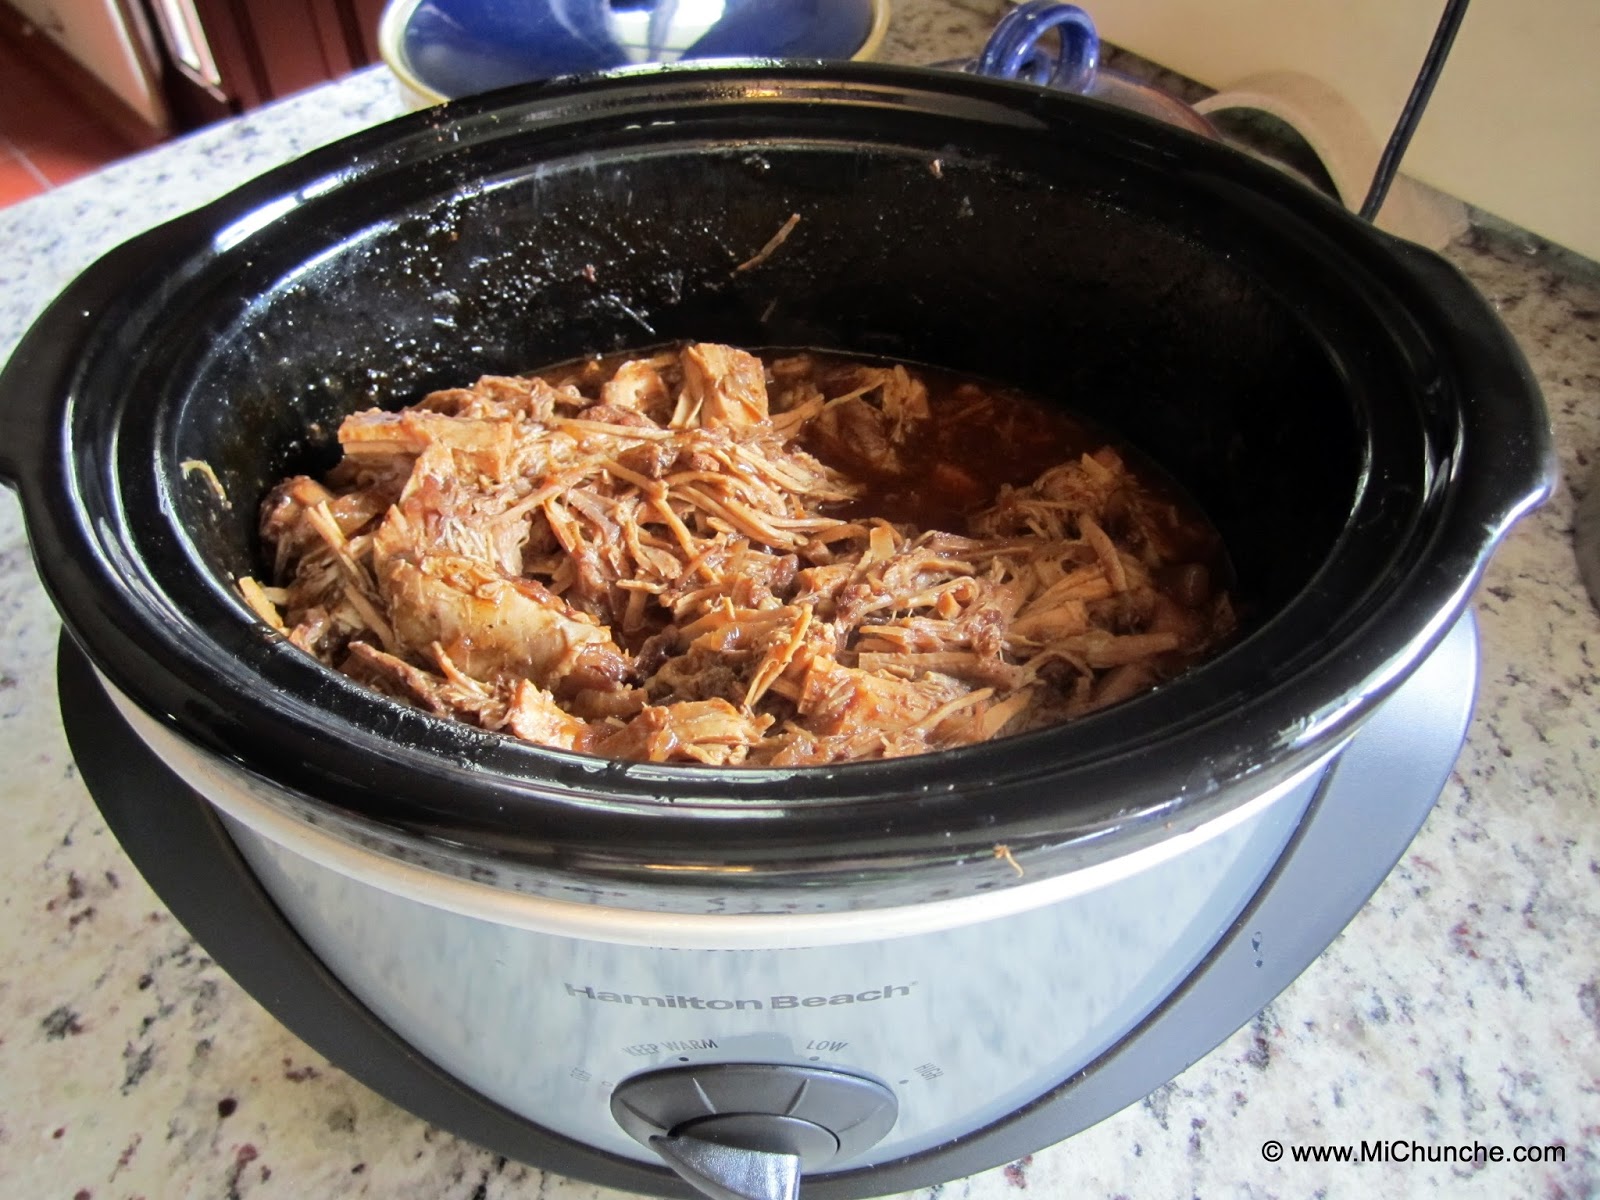
I came up with a simple new recipe for Sunday's Pork Roast dinner, using honey and balsamic vinegar. The meat came out wonderfully rich and flavorful, and perfectly fork tender. I put this on to cook on high, at 7 AM, and it was ready to serve by 1 PM. This recipe will definitely go on my "make it again" list. 

Ingredients:
4 pound boneless pork roast
1 tablespoon vegetable oil
1 tablespoon all purpose steak rub
1 tablespoon Worcestershire sauce
1 tablespoon Dijon mustard
½ teaspoon garlic powder
1/3 cup of honey
1/3 cup of balsamic vinegar
1/3 cup of chicken stock

Directions:
Grease the slow cooker with a tablespoon of vegetable oil. Thoroughly coat pork with steak rub and place it in the slow cooker with the fat side up. Mix all of the remaining ingredients in a small bowl. Pour this mixture over the pork, cover and cook on low for 6-8 hours, or high for 4-6 hours. The roast is ready when the meat shreds apart easily.

Serve with a side of rice, or potatoes, and steamed broccoli.

1

Monday, September 22, 2014

We were invited to an Oktoberfest Party and told to bring our favorite beverage, and a food item with a German flair.  I decided to make a batch of good old fashioned, sweet and sour red cabbage. It takes no time at all to put all the ingredients together. You just have to plan ahead for the cooking time.

Ingredients:
1 large head of red cabbage, shredded
2 apples, peeled and diced
1 small/medium red onion, diced
3 strips of cooked bacon, diced (optional)
½ cup raw sugar
½ cup apple cider vinegar
¼ cup water
2 tablespoons of butter
1 teaspoon of coarse ground sea salt
1 teaspoon of whole pepper corns, crushed
¼ teaspoon of whole caraway seeds (optional)
10 whole cloves

Directions:
Place all the ingredients in a slow cooker, set it to high temperature, and cook for 4 hours, stirring occasionally. (Note:  This can also be cooked on a stove top in a large pot on a low simmer for 1½ to 2 hours.)


Serves: 6
0

Monday, September 1, 2014

I am always looking for new ways to get my husband John, to eat green vegetables. Since he loves bacon and cheese on everything, I came up with a soup recipe using his key ingredients and my green veggies. I found it to be very delicious and John said, "It's not bad." That statement alone I take as a compliment from him, and I will make this again soon.

Ingredients:
2 tablespoons butter
1 cup of scallions sliced about ¼ inch thick (green onions, or cebollines in Costa Rica)
1 cup of celery, diced
2 cloves of garlic, peeled and thinly sliced
1 head of broccoli, trim off the woody part of the stem, and chop the rest, with the florets into pieces
3 cups of chicken or vegetable broth
3 tablespoons butter, melted
3 tablespoons flour
2½ cups of milk
2 slices of bacon, cooked and diced
1 cup of grated cheddar cheese
½ teaspoon fresh ground black pepper

Directions:
Melt 2 tablespoons of butter in a medium sized stockpot on medium/low heat. Sauté the scallions and celery until tender, then add the garlic, and continue to sauté for about 2 minutes to cook the garlic. Be careful not to burn it. Add the broccoli and broth to the stockpot. Cover it and let it simmer for about 10 minutes.

Use a potato masher to mash the broccoli as fine as you like it. I like mine a little chunky, so this is a question of taste. You can also use an immersion blender at this stage to puree the broccoli.

In a small sauce pan, melt 3 tablespoons of butter and add the 3 tablespoons of flour. Cook the flour in the butter for at least 3-4 minutes, or the soup will have a floury taste. Now gradually add the 2½ cups of milk and stir constantly until the sauce is thick and bubbly. 

Add the sauce to the broccoli in the stockpot. Then add the black pepper, grated cheddar cheese, and the diced cooked bacon. Bring everything to a low simmer for about 5 minutes and it will be ready to serve.

¡Buen Provecho!

Serves: 6

Note: Substitute cauliflower, or spinach, for the broccoli and you'll have more delicious soup options.

0

Friday, August 15, 2014

This is a twist on an old fashioned Creamy Rice Pudding recipe. Instead of raisins, try it with Craisins.

Traducción española sigue por debajo del Inglés

Rice Pudding

Ingredients:
2 cups cooked rice
2½ cups milk, divided
¼ teaspoon salt
Generous dash of cinnamon
¾ cup Craisins (dried sweetened cranberries) or raisins (optional)
1 egg, beaten
½ cup sugar
1 tablespoon butter
½ teaspoon vanilla

Directions:
Mix the cooked rice with 2 cups of milk, salt and cinnamon in a saucepan. Cook over medium heat until thick and creamy. Stir frequently to prevent the milk from scorching. This will take about 15 to 20 minutes.

Add the rest of the milk, the sweetened cranberries or raisins, the beaten egg, and sugar into the rice mixture; stirring continually. Continue to cook until the the egg sets up, about 2 to 3 minutes. Remove saucepan from heat; stir the butter and vanilla extract into the pudding.

Yield: 6 servings


Arroz con Leche

Ingredientes:
2 tazas de arroz cocido
2 ½ tazas de leche, dividido
¼ de cucharadita de sal
generosa pizca de canela
¾ taza de arándanos secos endulzados o pasas (opcional)
1 huevo batido
½ taza de azúcar
1 cucharada de mantequilla
½ cucharadita de vainilla

Preparación:
Mezcla el arroz cocido con 2 tazas de leche, la sal y la canela en una olla. Cocine a fuego medio hasta que esté espeso y cremoso. Revuelva con frecuencia para evitar que la leche se queme. Esto tomará alrededor de unos 15 a 20 minutos.

Añadir el resto de la leche (½ taza), los arándanos azucaradas o las pasas, el huevo batido y el azúcar a la mezcla de arroz; revolviendo constantemente. Continúe cocinando hasta que el huevo establece, unos 2 a 3 minutos. Quite la olla del fuego; revuelva la mantequilla y el extracto de vainilla en el arroz con leche.

Rinde: 6 porciones
0

Tuesday, August 5, 2014

This past month we spent a week in Texas visiting friends and family. The friends we stayed with offered us some of the new Flour & Corn Tortillas that are now being sold at our favorite grocery store chain, H.E.B. Wow, this blends the best of the soft flour tortillas with the great corn taste found in a corn masa tortilla!

One of my kitchen challenges in Costa Rica has been to make decent Enchiladas without breaking the corn tortillas sold here. This would be the ultimate solution, a tortilla that tastes just like corn tortilla, yet it is moist and soft enough to roll without breaking. Thus began my quest to develop the perfect recipe for my own Flour & Corn Tortillas.

I began reviewing the basic recipe for corn tortillas and decided it probably needed a mixture of 1½ cups of white flour and 2 cups of the corn masa harina (corn flour) to start. After just a few tweaks , I now have a recipe to share with you.

Ingredients:
1 ½ cups all-purpose white flour
2 cups corn flour (masa harina, maseca)
1 ¾ teaspoon salt
1/3 cup vegetable shortening (manteca vegetal in Costa Rica, not oil, think Crisco)
1 ½ cups lukewarm water approximately

Directions:
Combine the flours and salt in a medium sized bowl. I use a fork to thoroughly mix the flours. Cut in the shortening with a pastry cutter until the masa is well blended and resembles damp sand. Now, gradually add the water, starting with about a half a cup. Stir it with a spoon or fork, and keep adding a little more water. At this point you will need to start kneading the masa by hand. Keep adding small amounts of water and kneading until the masa is pliable, about the consistency of Play-Doh clay, but not too wet.
Cover the bowl of masa with a damp towel and let it rest for about 20 minutes. After the masa has rested, sprinkle a little flour over the surface and knead the masa for a minute or so. Now, divide the masa into 16 small ball of dough, about an 1¼ in diameter. The easy way is to divide the large ball of masa in half, then divide each of these into 2 more balls, then divide the 4 balls into 8, and finally divide the 8 in half to give you 16.

I have a cast iron griddle that stretches across two burners on my stove, so I can fry 2 tortillas at once. Set your temperature to medium/high heat (if you don’t have cast iron, use a skillet that can take the high heat with NO oil.)

Take a large plastic food storage bag and cut off the top section with the zipper/closer, and discard it. Slit it along both sides, leaving the fold at the bottom intact. The plastic will need to measure about 7” inches from the fold to the top and the width need to be at least the same, or greater.

Add a heaping tablespoon of flour to a small bowl for dusting each ball of masa.

If you have a tortilla press, place the folded edge of the plastic next to the hinge when you are ready to press. Now lightly dust a ball of masa in the flour and place it between the plastic, about an inch from the hinge, close the tortilla press, and push down on the handle until you have a nice thin rounded tortilla.

Gently peel the tortilla off the plastic and fry it on the hot griddle, or hot skillet, for 35-45 seconds on each side. As you are frying one tortilla, you can dust the next ball of masa and press it. Stack the finished tortillas onto a platter, or covered tortilla dish, to keep them warm.

Note: If you don’t have a tortilla press you can still press out the balls of masa between the plastic by hand, or by using a rolling pin. It will be a little harder to keep them round, but it is a technique Latin women have mastered for generations.

Servings: 16 tortillas

Prep Time: 30 minutes
Cook Time: 30 minutes
0

Saturday, June 14, 2014

This recipe has been a family favorite cookie recipe since back in the 50's. It's so easy to change these up, by just changing the type of nuts. They are always a big hit.

Ingredients:
¾ cup brown sugar, well packed
¾ cup white sugar
1 cup butter softened (2 sticks)
2 eggs
1 teaspoon vanilla extract
2¼ cups flour
1 teaspoon baking powder
½ teaspoon baking soda
½ teaspoon salt
1 cup whole rolled oats
1 cup chopped nuts – almonds, pecans, walnuts, or macadamia (optional)
2 cups semi-sweet chocolate chips

Directions:
Preheat oven to 375°F.
In a small bowl mix the flour, baking powder, baking soda & salt and set it aside. I use a fork to blend the dry ingredients.  Cream the sugars and the butter until well mixed. Add the eggs one at a time, then the vanilla and mix well. Gradually add the dry ingredients and mix well. Fold in, by hand, the oatmeal, chocolate chips and nuts until well blended.  Drop rounded tablespoons full of cookie dough on a cookie sheet. If you have a melon ball scoop, this will work very well. Bake the cookies 15 minutes for chewy cookies and 17-18 minutes for crispy cookies. Between batches, I store the dough in the refrigerator. I think the cold dough cooks better than when kept at room temperature.

You can also roll the dough into balls to store them in the freezer until you are ready to bake. When you are ready to bake, you will need to add an extra minute or two to compensate for the frozen dough.

Yield:  approximately 6 dozen

0

Saturday, June 7, 2014

These potatoes are just about the very best "Potatoes Au Gratin" ever! This is not my original recipe, but I have modified it a bit, and made it my own. I reduced the amount of cream, and I also use cheeses and herbs that are readily available to us in Costa Rica. Russet potatoes are not an option here, so I use white, yellow, and red potatoes. Every time I wanted to make these I had to search for the original recipe on the internet again, and then try to remember how I modified it. It was time to add my recipe here, where I can find it when I need it, and so can you!

Ingredients

  • 3 ounces finely grated Manchego, Sharp White Cheddar, Gruyère or Comté cheese
  • 2 ounces finely grated Pecorino Romano or Parmigiano Reggiano cheese
  • 1 cup, or 250ml, of heavy cream
  • 2 medium garlic cloves, minced
  • 1 tablespoon of whatever fresh herbs you have on hand, like thyme, rosemary, parsley, and basil, roughly chopped (You can also use a mix of dried herbs, buy only use 2 teaspoons)
  • Coarse ground salt and freshly ground black pepper
  • 1½ to 2 pounds of potatoes, peeled and sliced 1/8th-inch thick on a mandolin slicer (3 to 4 medium size potatoes, the longer & thinner the better) I use a mix of red and white potatoes. Rinse the potatoes with cold water to release some of the starch and thoroughly drain.
  • 2 tablespoons butter


Directions

  1. Grease a 2-quart casserole dish with butter (I find a deep dish casserole, oval or rectangular, works best). Adjust oven rack to middle position and preheat oven to 400°F. Combine cheeses in a large bowl. Transfer 1/3 of cheese mixture to a separate bowl and set aside. Add cream, garlic, and herbs to cheese mixture. Season to taste with salt and pepper. Add potato slices and toss with hands until every slice is coated with cream mixture. Separate every slice so the cream mixture evenly coats them them.
  2. Pick up a handful of potatoes, make a neat stack, and lay them on end in the casserole dish with the edges vertical. Stack the potato slices like this from the outside perimeter, working your way to the center until all potatoes have been added. The potatoes need to be very tightly packed. If necessary, slice an additional potato, coat with cream mixture, and add the slices to the casserole (this is why longer & thinner potatoes work best, because you get more slices). Pour excess cream/cheese mixture evenly over potatoes until the mixture comes half way up the sides of the casserole. You may not need all excess liquid.
  3. Cover the dish tightly with foil and bake for 30 minutes. Remove the foil and bake about 30 minutes more, until the top is a light golden brown. Remove the dish from the oven and sprinkle the remaining cheese on top. Return the potatoes to the oven and bake until they are deep golden brown and crispy on top. This could take another 30 minutes, or so. Let the potatoes rest for a few minutes before serving.


Serves:  4 to 6

Total time: 15 minutes of prep work, plus 1½ hours baking

2

Sunday, February 2, 2014

I am delighted our local farmers' market has started selling deliciously sweet grape tomatoes. I usually try to buy a kilo box whenever I am there. Today I found I had too many left over to keep for more than a day or two, so I oven roasted them.

Ingredients:
1 pound of grape or cherry tomatoes sliced in half
1 tablespoon fresh minced basil
1 tablespoon fresh minced oregano
2 cloves of garlic minced
salt and fresh ground pepper to taste
olive oil
parchment paper
baking sheet

Directions:
Preheat oven to 350° F.

Toss the sliced tomatoes in the herbs, garlic and olive oil until well coated, add salt and pepper to taste. Lay the tomatoes cut side up onto the baking sheet lined with parchment paper.

Bake for about 45-50 minutes, until the tomatoes begin to collapse.

Cool completely before storing.  They can be stored in an air tight jar in the refrigerator for about 5-7 days, or you can pack them in olive oil with some Kalamata olives.

The tomatoes can be served as an antipasto, tossed in pasta or a salad, layered on sandwiches, served with olives, cheese and crackers, or on bruschetta. Just use you imagination.

0

Author